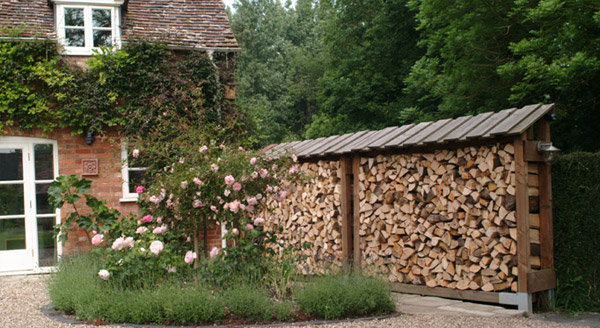


Certainly Wood Compact Log Store 124 x 183 (rear) x 82cm
Brand: Certainly Wood
£329.00
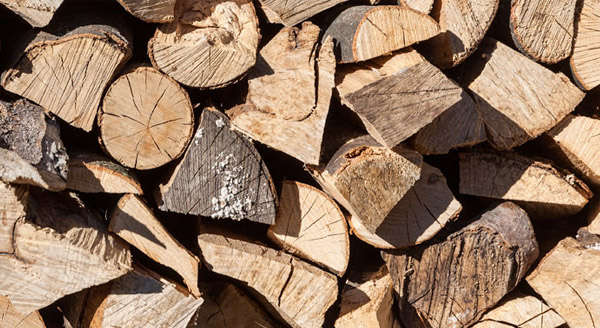
The store is pressure treated with preservative and has an open front with slatted sides for maximum airflow through the logs. It is fitted with a weatherproof felt roof as standard. Stores are delivered in a flat pack format with clear instructions and easy to construct.
PLEASE NOTE: The Weathershield, shown in the pictures, is NOT included in the log store price and is supplied as an accessory.
You can purchase the weather shield here.
Dimensions (single log store)
Width: 124cm
Depth: 82cm
Height (front): 167cm
Height (rear): 183cm
LOCAL DELIVERY WITHIN DERBYSHIRE AND SURROUNDING COUNTIES. FOR DELIVERY OUT OF THIS AREA, PLEASE CONTACT US
On order from manufacturer
Watch a video showing assembly, HERE.
Assembly Instructions
Before you start
Make sure you place the wood store on a lavel surface suitable to support the weight. Distortion may occur if the store is not placed on a stable surface.
Take the bag of screws and seperate them into individual sizes. you should have the following
| Label | Length | Diameter | Quantity |
|---|---|---|---|
| A | 20mm | 4mm | 16 |
| B | 45mm | 4mm | 66 |
| C | 60mm | 4mm | 2 |
| D | 60mm | 5mm | 4 |
| E | 80mm | 5mm | 2 |
| F | 90mm | 5mm | 8 |

You should also have the following parts

Tools you will need
- Battery type screw driver with clutch and pozi drive tip
- Tape measure
- Step ladder
- A willing assistant (to help you lift the log store)
You should consider adjusting your screwdrivers’ slip clutch to prevent overpenetration of screwheads. This can cause the wood to splinter.
Step 1
Lay part B (base) on its long edge with legs pointing away from the proposed wood shed construction. Lay part A (side panels) on the ground either side of part B (base) with their longest edge on the ground and the hinges closing inwards.
Line up the top of the case to the top of the lowest cross member.
Screw four 90mm screws into either side as shown below.

Step 2
To fit the lintel (part D) straighten the two sides and place the lintel at the top of the structure so that it rests on the top of the highest cross member. Secure with 2 80mm screws.

Step 3
Life the part constructed assembly onto its feet, ensure it is level and insert the lower Part C (back panel). Secure with 45mm screws as shown. Repeat for the upper section.
Then fit 2 metal brace plates to the centre and base on the rear panels. Use 4 20mm screws for each brace plate
Step 4
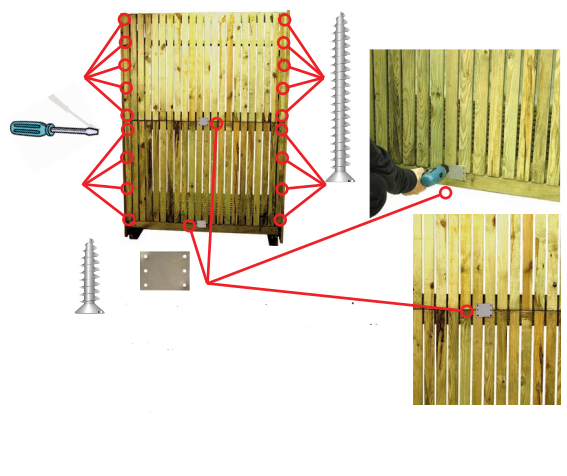
The facia palters are in four pieces (parts E x 2 and G x 2). Parts G are the longer parts and have an angle at one end, these shouldbe fitted first with the angle in line with the roof (facing forwards with 5 45mm screws.
Fit screws X and Y first on each side then straighten the sides before fitting screw Z. Then fit remaining screws and facia panel E.
Part E is fitted with 2 45mm screws and 1 60mm screw.
The 60mm screws should be fitted into the log store support feet.

Step 5
Fit the 2 metal brace plates (part I) to the inside front facia uprights using 4 20mm screws for each plate. These plates join Part E and Part G together.

Step 6
A) Line roof panels with rear edge and side of log store.

B) Place part L x2 Rear Roof trim leaving a 70mm gap in the center.

C) Fit left and right T sections (part H) and roof cover strip (part F).
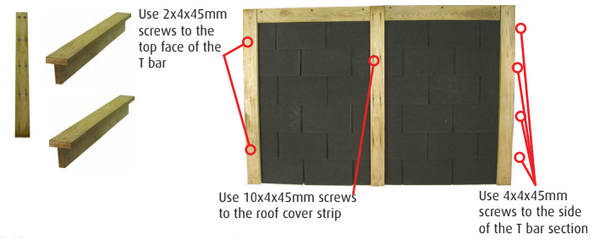
D) Fit 4 60mm screws up through the lintel D into the roof section

Related products


Get in touch
If you need any advice or have any questions about any of our products or services, please don’t hesitate to contact us. We are always happy to help!
01773 820 940